
This post has been sponsored by The J.M. Smucker Company and Kellogg Company. All thoughts & opinions are my own.
It’s no secret among my family and friends just how much I love a good cheese plate: both creating them, and of course, indulging in them. Their biggest appeal, in my book, is that they’re incredibly easy to make, (as easy as buying things and arranging them on a plate), and the finished result is impressive and delicious!
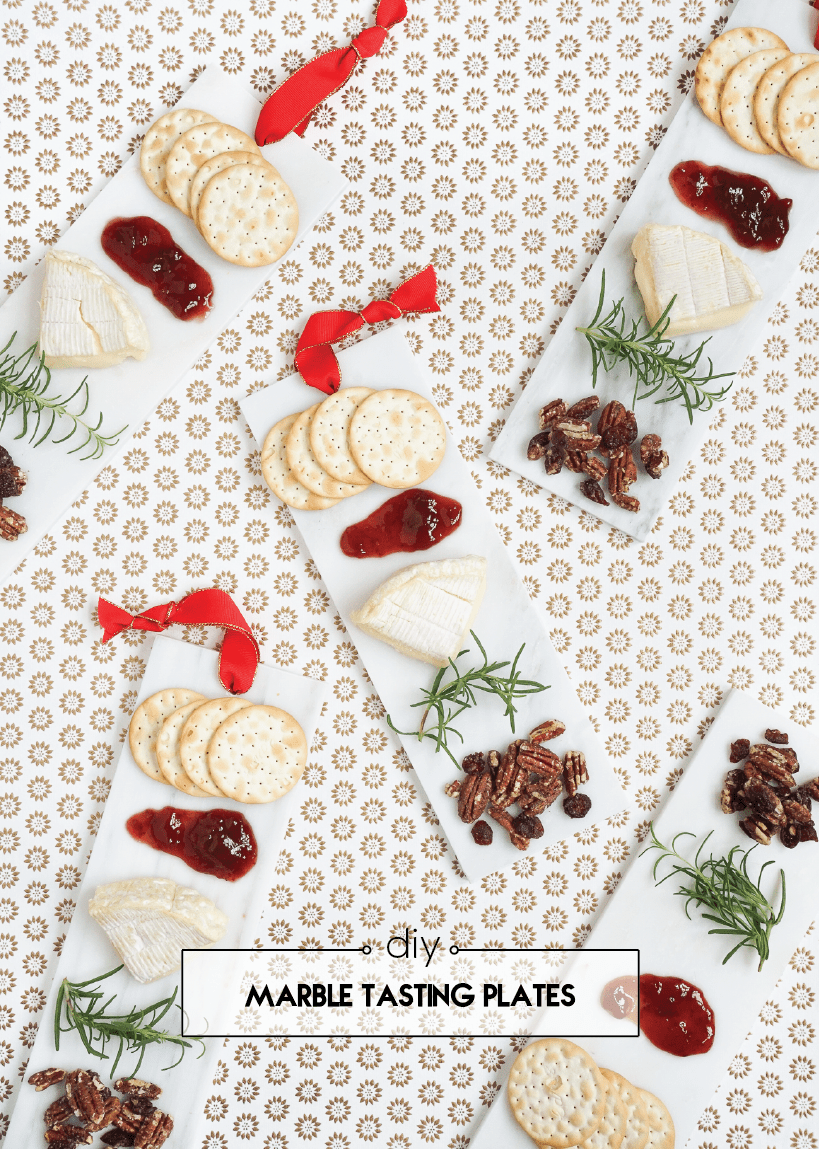
Ken and I are hosting with my side of the family this year, so I’m teaming up with The J.M. Smuckers Company & Kellogg Company to switch things up in the cheese plate department. As an alternative to the big free-for-all tasting plate that we’re all familiar with, I’ve created smaller individualized plates for guests to mix and match according to personal flavor preferences and add a fun twist to Holiday dinner or even girls’ night! Read on for the step-by-step on how I made the marble tasting plates as well as exactly what ingredients I incorporated to create a tasting experience that’s as pretty as it is crave-worthy.


DIY Mini Tasting Plate Materials:
- 4″ x 12″ Marble Tiles – I used honed finished tiles, but polished will work great too!
- Electric Drill
- 1/4″ Glass & Tile Drill Bit
- Clear bumpers
- Red Ribbon
- T-Square
- Marker or Pencil

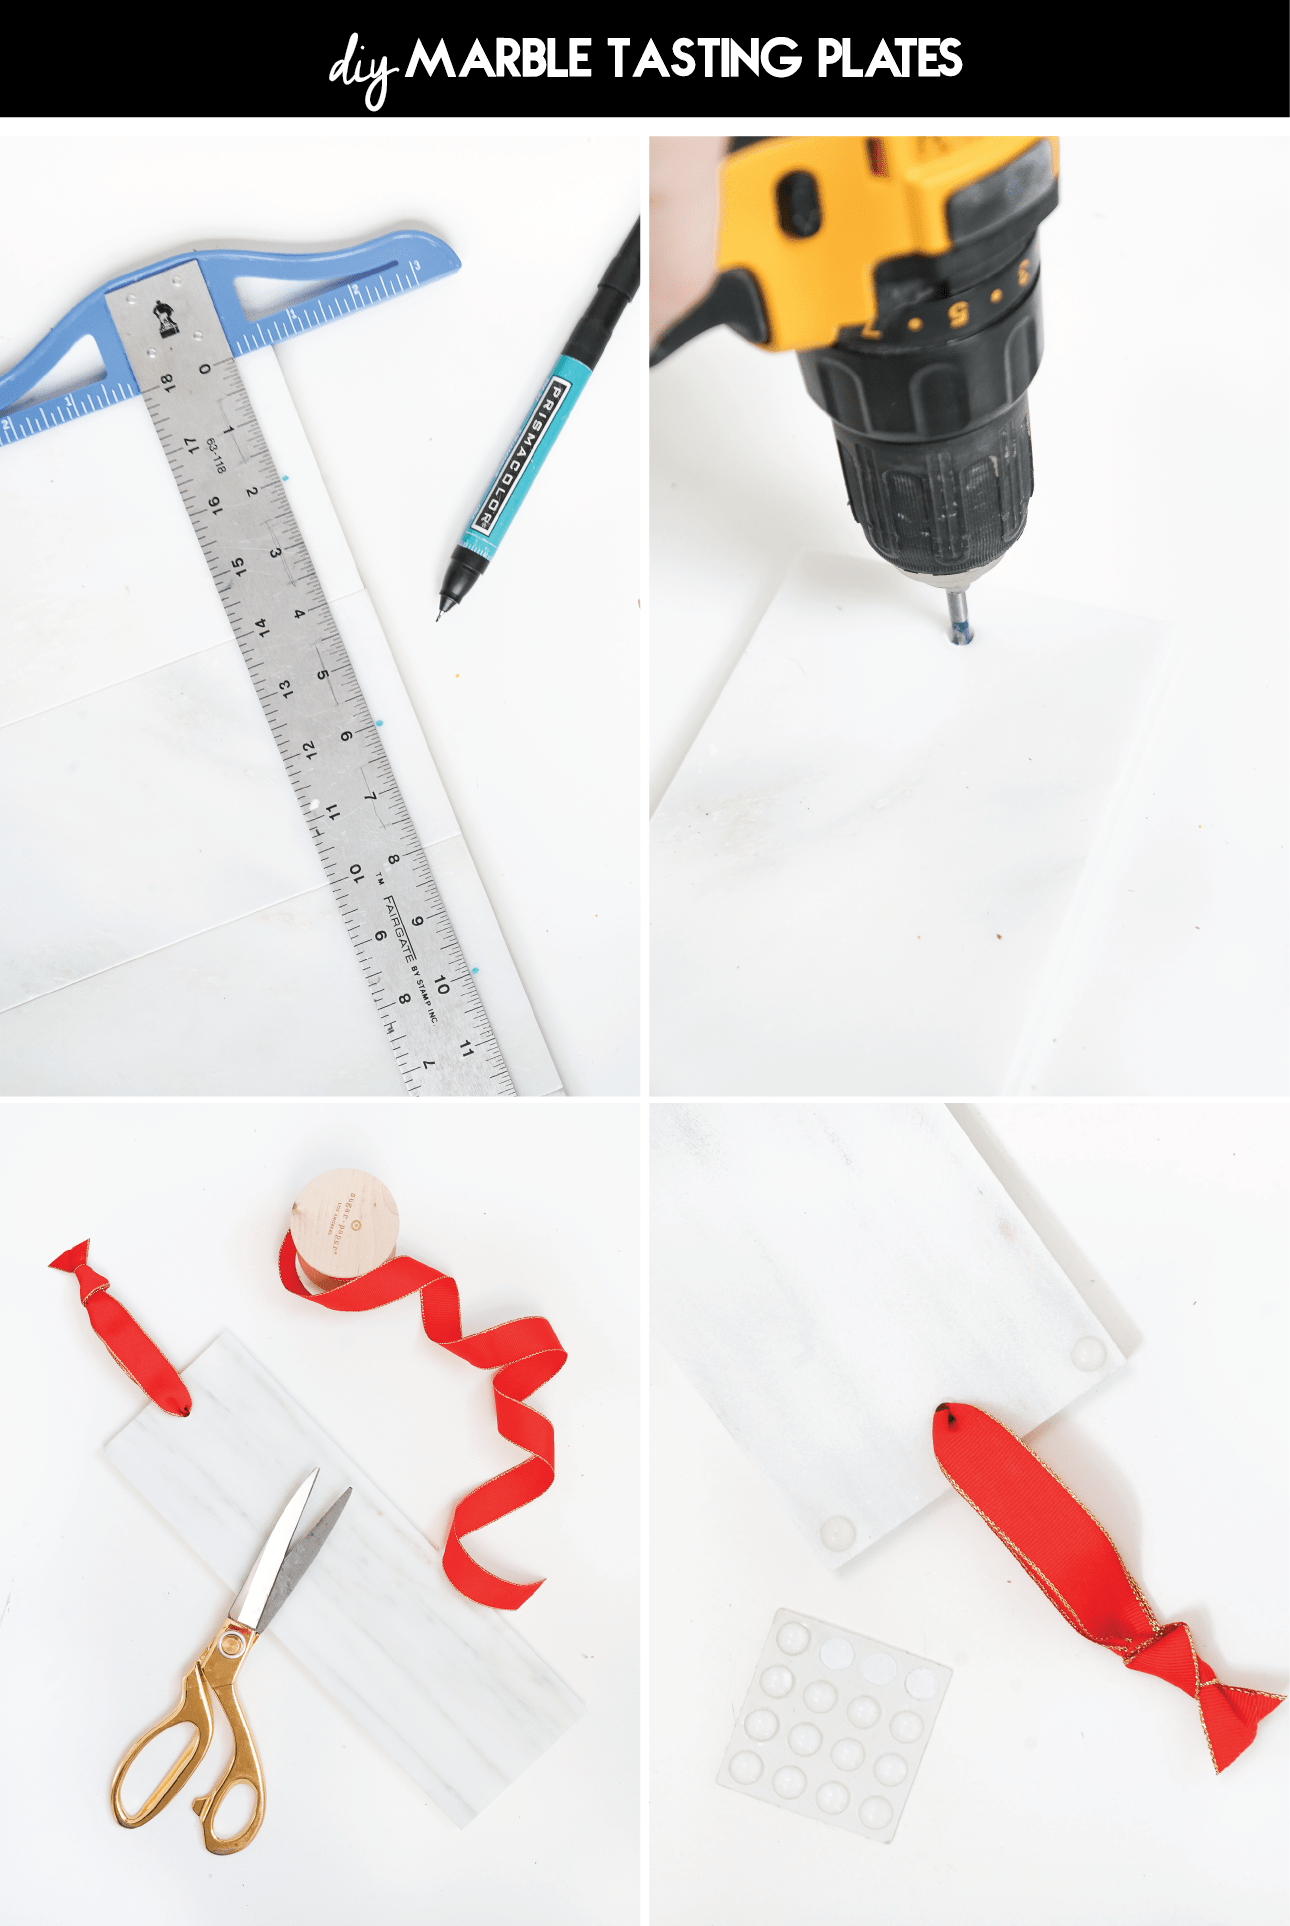
- At one end of the tile, mark the midpoint of the short side, about 1/2″ in from the end.
- Use your electric drill fitted with a glass/tile drill bit, to drill a hole in each tile.
- Wash tiles thoroughly with soap and water.
- Thread a 15″ long piece of ribbon through each of the drilled holes and tie the ends in a knot.
- Add bumpers to the bottom corners of each tile.
- Load up your tasting plates!

Creating and Arranging the Plates
From sweet to savory to a peppery kick finish, you want to make sure you’re incorporating a range of flavors for a complex tasting experience. My perfect bite, and the combination I had in mind when choosing ingredients to include in the tasting, started with a thin and crispy cracker, like Carr’s Table Water Crackers, as a platform to build on. Then I added a smear of naturally sweetened, Smucker’s Fruit & Honey Strawberry Fruit Spread, followed by a slice of creamy camembert. And lastly I topped things off with rosemary and few Sahale Snacks Valdosta Pecans Glazed Mix for a little peppery heat at the end. The combination of these flavors is so freaking good, you guys, but the real beauty here is that people can mix and match to find their own perfect bite!


Ingredients: I picked everything up at Target using Cartwheel coupons to get the best price. Check out the links & discounts below to add the ingredient coupons to your Cartwheel App. Also, don’t forget to PIN this post so you can quickly pull up the ingredient list at the store.
- Carr’s Table Water Crackers – Save 5%
- Smucker’s Fruit & Honey Strawberry Fruit Spread – Save 20%
- Sahale Snacks Valdosta Pecans Glazed Mix – Save 20%
- Wheel or Wedge of Artisan Cheese such as Brie or Camembert
- Fresh Rosemary Sprigs
- Mirassou Pinot Noir Wine

1. Cut the rosemary into smaller 3-4” sprigs, and portion out the artisan cheese into wedges. If you’re using a large wedge of cheese, rather than a wheel, just cut the wedge into smaller triangles to simulate that it was cut from a cheese wheel
2. When arranging the plates, I try to arrange the components in the order that someone might assemble a cracker bite, so from left to right: crackers + fruit spread + cheese + rosemary + glazed pecan mix
3. Serve up the tasting plates as the first course to dinner or as girls’ night nosh, and don’t forget the wine! Pinot noir pairs beautifully with the Wintery flavors here–I like the full bodied red fruit and vanilla notes of Mirassou’s Pinot Noir.


And that’s really all there is to it. I hope this post inspires you to try mixing things up this Holiday season. Who knows maybe you’ll discover a new tradition while you’re at it!
Tablescape Sources: Striped Napkins | Navy & White Table Runner | Red Ribbon | Gold Vase
Think this post is worth a read? Please share the love!


Alice
December 6, 2016 at 6:29 amI am not sure about food contact safety of this marble tiles
francoisetmoiblog@gmail.com
December 8, 2016 at 12:20 pmHi Alice,
The marble is the same material as used for kitchen countertops.
Alice Che Photography
December 8, 2016 at 12:17 pmOh my!! I love those! I’m going to ask my boyfriend to make me some if I can find some good tiles 🙂