
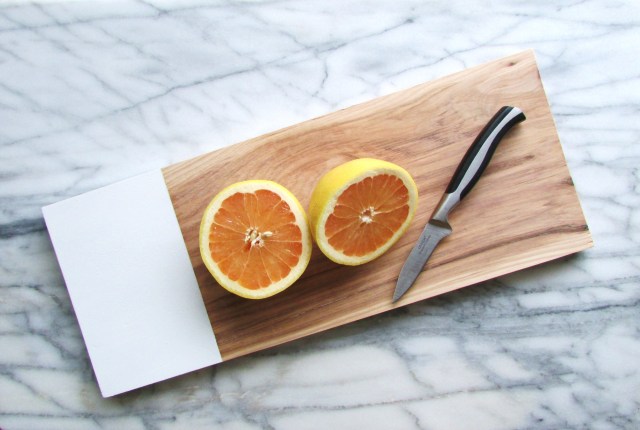
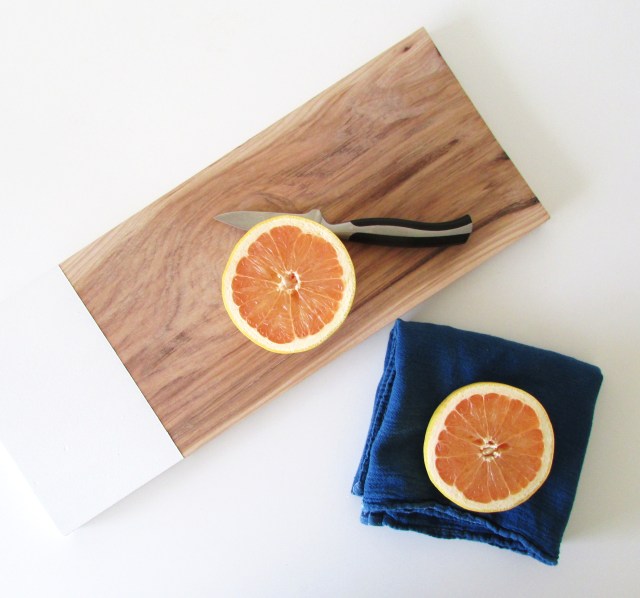
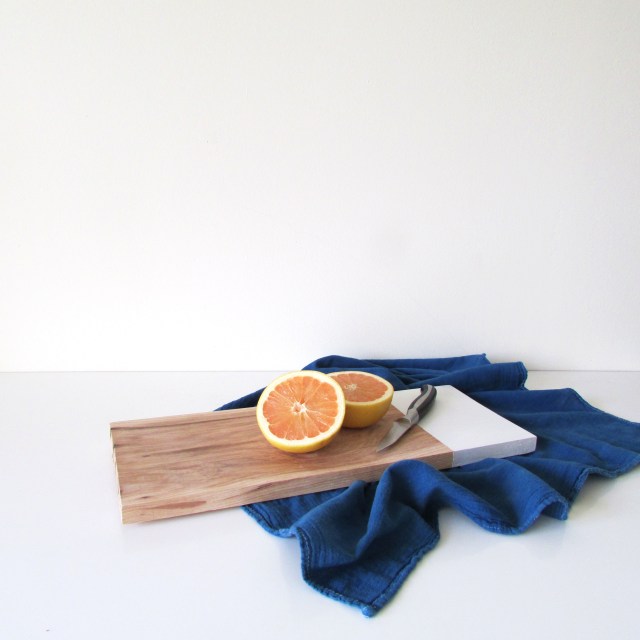
Happy Thursday! The DIY project I’m sharing today is so freaking easy, it’s silly, and it’s one you can start and finish in the same day. I’ve been looking awhile now for a simple hardwood cutting board to use for everyday kitchen chopping and also to use as a cheese board or platter when we have guests over. I couldn’t anywhere find exactly what I had in mind, so I decided to simply make it this past Saturday. We picked up an 8″ x 18″ hickory board at our local hardware store, sanded it, added a little paint, and voila! we had a cutting board in a matter of hours. We chose to use Plasti Dip rather than regular paint because since we planned to use the board around food, we wanted something that was a little safer, not to mention Plasti Dip is wipeable when completely dry. Here are the details on how to make one for yourself!
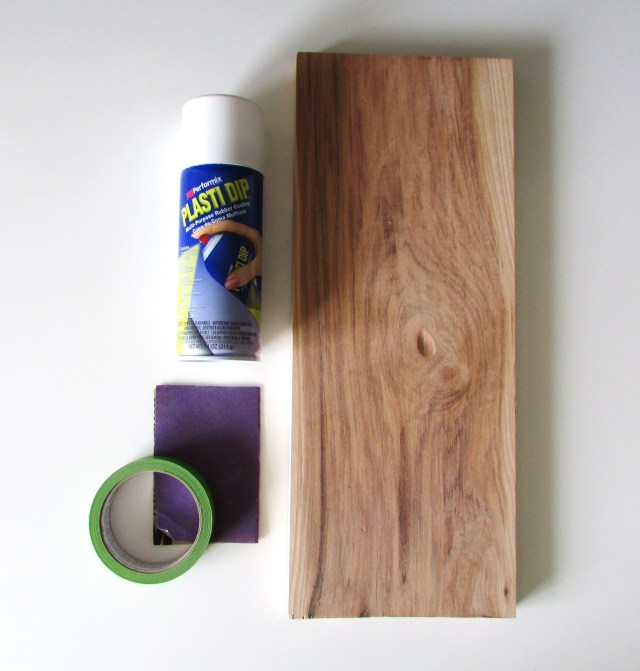
Materials List:
- 8″w x 18″l x 1″d hardwood board, such as Hickory or Walnut. We picked our board up at Menard’s, and had them cut the board down to the 18″ length for us.
- Sand Paper
- White Plasti Dip Spray Paint
- Painter’s Tape
- Measuring Tape
- Pencil
- Plastic Grocery Bag
- Drop Cloth
1. Sand the raw edges and surfaces of the board with sandpaper until completely smooth. Wipe down sanded board with a damp cloth to remove sawdust.
2. Measure, mark and tape off the area that you’d like painted.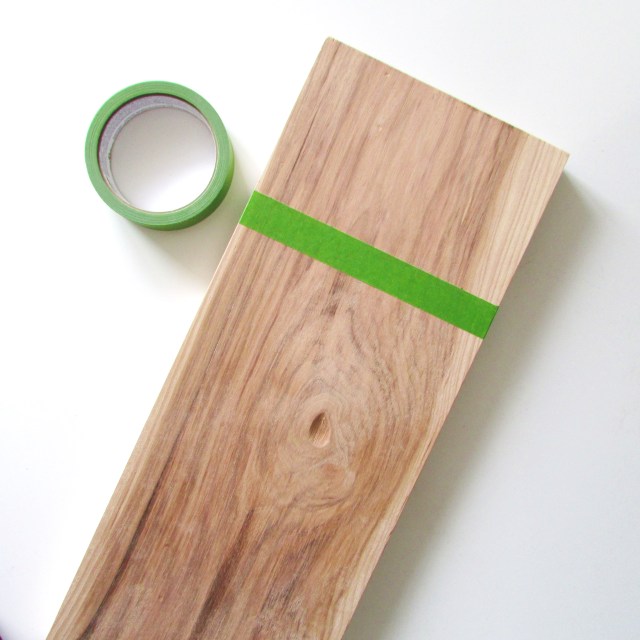
3. Protect the portion of the board not being painted, by placing this portion inside the plastic grocery bag, adding tape to secure it in place.
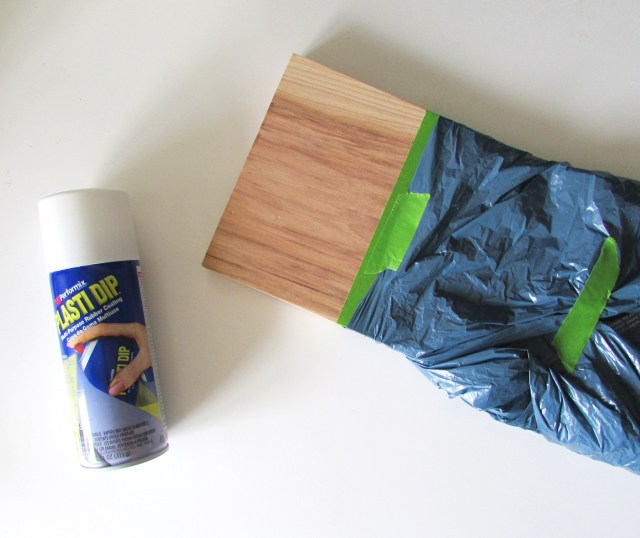
4. Lay down a drop cloth in a well ventilated area (or on your apartment balcony like we did).
5. Apply several coats of paint to the top, sides and bottom of the board, allowing each coat to completely dry in between.
6. Remove the plastic bag and painters tape.
Note: Depending on how thick your paint layer is, you may want to use a knife to score the edge of the painter’s tape where it meets the painted board before removing the tape, as the paint layer will be rubbery and some of the paint could potentially peel off with the tape.


The Art of the Simple Summer Picnic | francois et moi
July 8, 2014 at 7:31 am[…] Like the hickory serving board and indigo tea towels? Learn how to make them here and here. […]
Serviced Apartments Resident
July 22, 2014 at 10:36 amThe white block really makes all the difference!
Anu
August 19, 2014 at 9:12 pmLove how simple this is! Lovely
francoisetmoi
August 20, 2014 at 7:51 pmThanks Anu! If you make one, let me know how it turns out!
Melissa
August 23, 2014 at 10:58 pmThis is food safe?
Emily
September 10, 2014 at 3:54 pmYes, http://www.plastidip.com/faq.php
Szerdai ötletelés #6 | Heart
August 27, 2014 at 3:09 am[…] DIY hickory chop board (François et Moi) 2. DIY rope camera strap (A Pair and a Spare) 3. DIY concrete candlesticks […]
Ally
September 10, 2014 at 8:50 pmI love how you’ve styled the images at the end. So simple but everything just works!
francoisetmoi
September 11, 2014 at 7:32 amThank you, Ally! 🙂
6 DIYs to Try This Weekend | Paper and Stitch
September 12, 2014 at 6:57 am[…] minimal cutting board DIY idea from Francois et […]
Finally Fantastic Fabulous Freaking Friday | A Beautiful Recovery
September 12, 2014 at 11:05 pm[…] http://blog.freepeople.com/2014/09/run-101-start-running-routine/http://www.almostmakesperfect.com/2013/12/26/diy-gold-fringe-party-hats/http://mashable.com/2014/09/01/emily-blincoe-photography/https://francoisetmoi.com/2014/03/27/handmade-hickory-chop-board/ […]
Weekend Notes
September 14, 2014 at 8:15 pm[…] A cutting board DIY anyone can do. […]
DIY Striped Drink Perch - Francois et Moi
May 16, 2016 at 12:52 pm[…] the Hickory Chop Board I made earlier this year? Well I’ve been holding onto the left over boards ever since, […]