

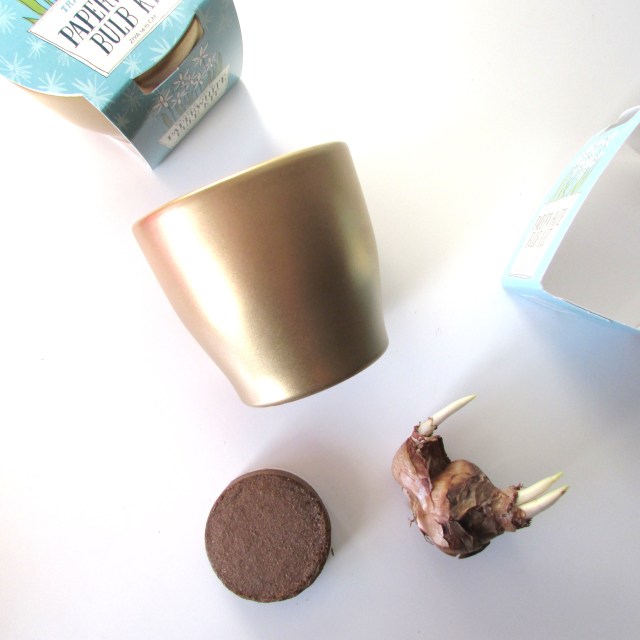
Last week, right after we turned the corner from Thanksgiving to Christmas, I stopped in to Trader Joe’s for my weekly grocery stop and was delighted by their newly staged Holiday floral section that greeted me as I walked in. Nestled amongst the fresh red berry branches and coniferous wreaths, were mini Paperwhite Bulb Kits that immediately caught my attention. The kits included everything needed to start a paperwhite plant and were enclosed in a pretty, mini metallic gold pot, so I thought I’d stock up on a few for quick hostess gifts this season. I always think flowers are a good idea when it comes to hostess gifts, as they are truly the gift that keeps right on giving. Below was my strategy for getting the bulb kits gift-ready.

Materials List:
- Trader Joe’s Bulb Kit
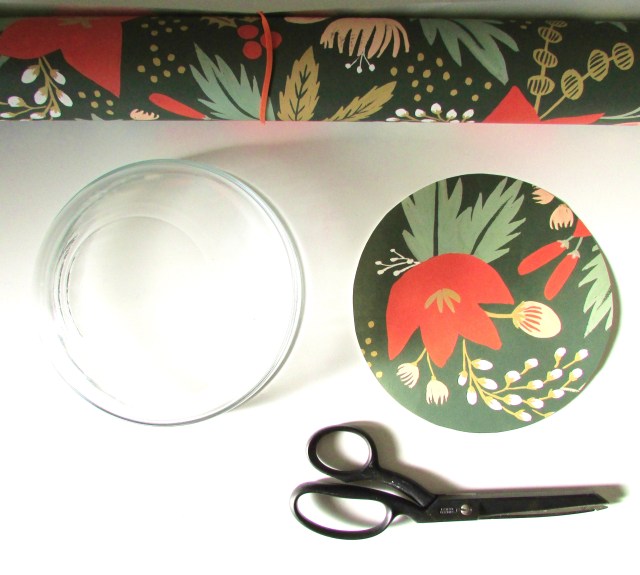
- Rifle Paper Co Holiday Greens Wrapping Paper from Paper Source
- Gold Pen
- Scissors
- Black and White Baker’s Twine
- 6.5″ – 7″ Diameter Bowl
- T-square Ruler

Step 1. Place bowl upside down on the wrong side of the wrapping paper, and trace around the bowl.
Step 2. Cut circle out with scissors.
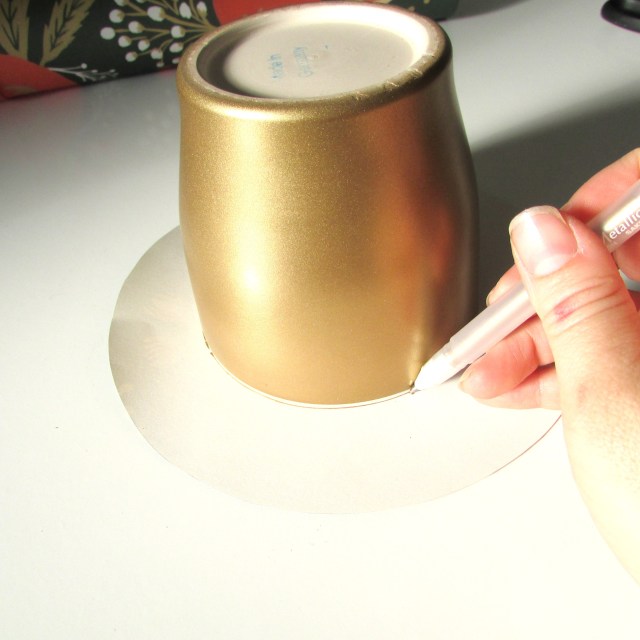
Step 3. Place the gold pot upside down on the center of the circle and trace around it. This will be your guideline for keeping the pot centered as you fold the paper around the mouth of the pot.

Step 4. To add in a personal element, I included a handwritten set of instructions for planting and caring for the paperwhites, rather than using the cardboard instructions that come with the kit. To create the ” instructions card,” use a T-square to draw a 5″ x 7″ rectangle on the backside of the wrapping paper.
Step 5. Cut out rectangle, and copy the planting and care instructions from the original packaging onto the backside of the wrapping paper.


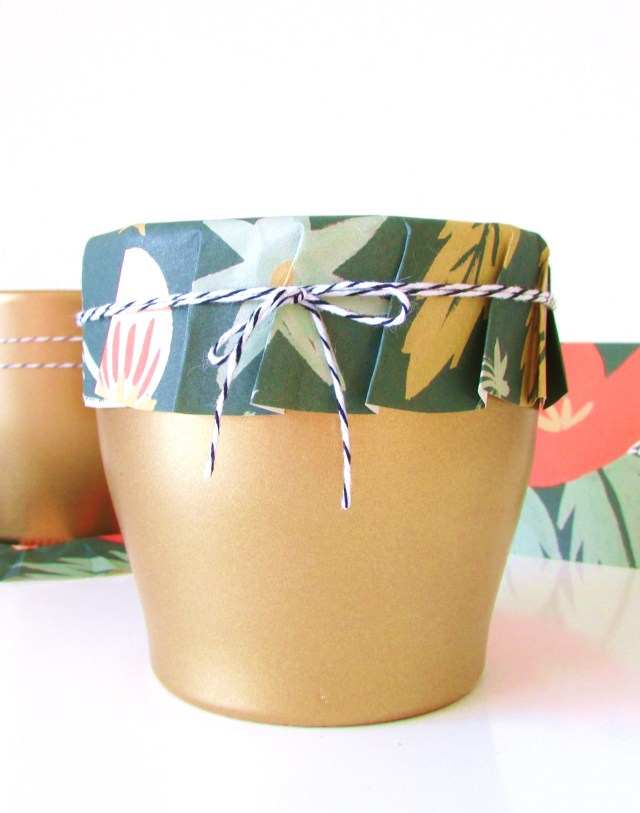
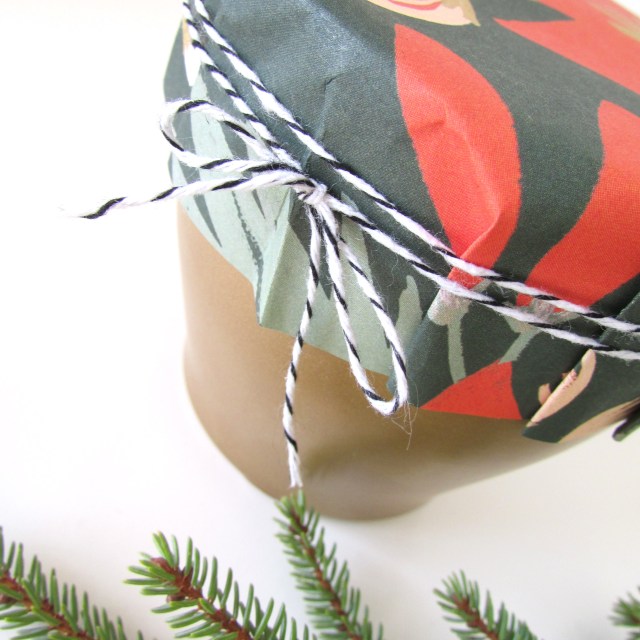
Step 6. For the pleated paper cap, place the gold pot upside down centered on the circle drawn on the backside of the wrapping paper from step 3, and begin folding the paper around the mouth of the pot, so that it forms a pleat every 1/2″. Continue until the paper is pleated around the entire pot.


Step 7. Place the bulb, compressed planting soil disc, and instruction card into the pot (don’t actually plant the bulb), cover with pleated paper cap, and tie with baker’s twine. Et voila!


Handmade Gift Round-up | francois et moi
December 20, 2013 at 1:41 pm[…] Indigo Tea Towels, b. Lavender Sachets, c. Salted Bourbon Caramels, d. Vanilla Extract, e. Paperwhite Bulb Kit, f. Tartan […]
The Blooming Paperwhite | francois et moi
January 6, 2014 at 3:20 pm[…] I put together the DIY Paperwhite Bulb Kits over the Holidays, (see that post here) I picked up an extra one for myself and planted the bulb around the same time. The bulb took just […]