I’m in a tassel craze at the moment, and I love seeing them appearing across several facets of design, from interiors to party decor to fashion and beyond. Believe it or not, tassels are super easy and fun to make, and ever since I learned how to make them, I’ve been tasseling up a storm! Here’s a quick little tutorial on how to bring a little tassel love into your life.

Materials List:
Tassel:
- 1 or 2 pack(s) of embroidery floss such as DMC. I used two different shades of lavender floss for contrasting wrap.
- Credit card sized sturdy rectangle.
- 2 bright copper jump rings, 7mm
Bracelet:
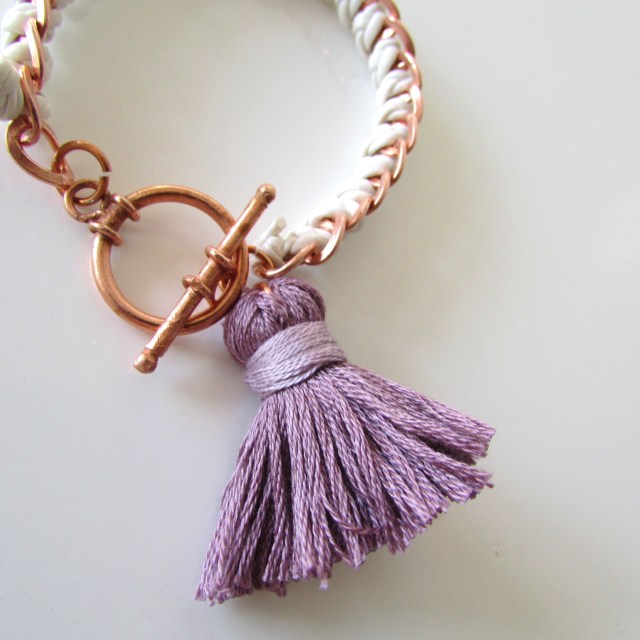
- 6-7″ Rose gold (or copper) chain depending on wrist size. Available at most bead/jewelry making shops.
- 15-16″ White faux leather flat braid cord
- 1 Additional bright copper jump ring
- 1 Rose gold toggle clasp. Available at most bead/jewelry making shops.
Tools:
- Scissors
- Wire cutter
- Pliers

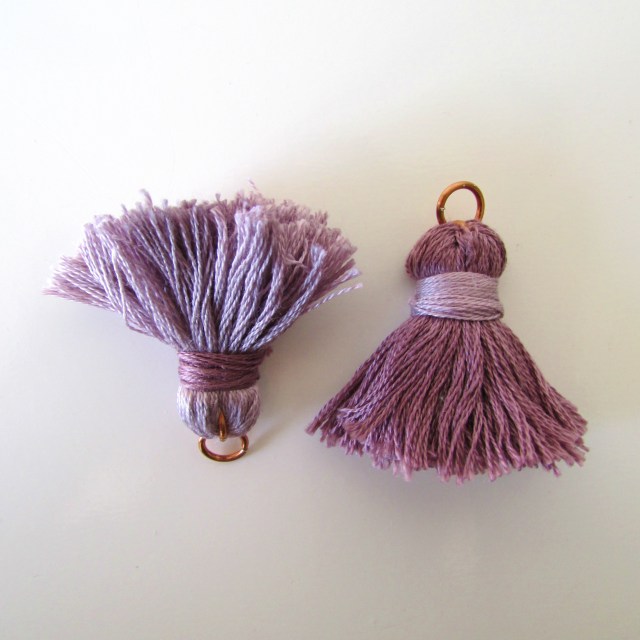
1. Begin by wrapping the embroidery floss around the length of the credit card several times, about 2/3 of the floss pack and cut floss from the floss strand.
2. Slide the floss off the card, and slide the jump ring onto the center of the folded floss. Use pliers to close the jump ring.
3. Fold the floss on either side of the jump ring down to meet each other, essentially folding the floss in half. Slide the 2nd jump ring onto the jump ring you just closed with pliers in Step 2.
4. Cut an 18″ long piece of floss, and tie a knot around the tassel, just below the jump ring leaving a 2″ tail on one end.
5. Wrap the long end of the floss strand around the tassel several times leaving the 2″ tail exposed. To secure the wrap tie a knot with the 2″ tail and the long end. Trim the tails as close to the knot as possible. You may want to secure the knot with a dot of glue (optional).
6. Trim the loops at the bottom of the tassle to create the fringe.

1. Add the circle end of the toggle clasp onto the jump ring attached to the tassel, as well as a jump ring to the rod end of the toggle clasp.
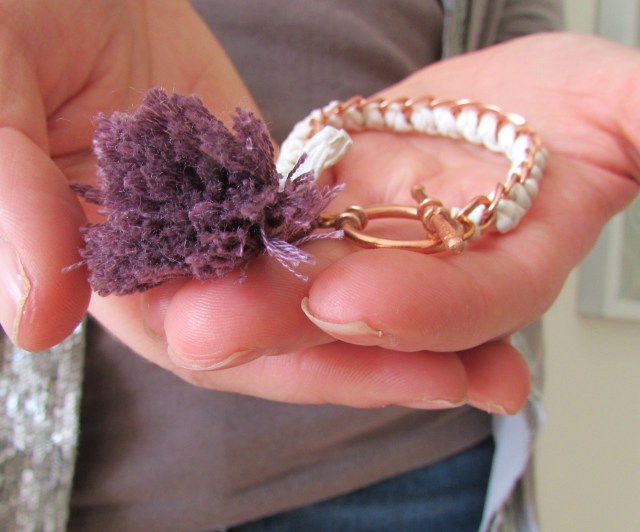
2. Lay the chain flat in front of you and thread the faux leather cording through the underside of the 2nd chain link on the right end of the chain. Then thread the cording through the underside of the next link to the left and pull through the link forming a whipstich. Repeat until the entire chain is threaded.
3. On the end of the chain with the open link, tie a self knot, so the cording doesn’t slip through the chain, and trim the cording. I left a bit of a tail, as I like the look. On the opposite end, separate the strands of the cording braid and tie them together around the last link. Trim as close to the knot as possible.
4. Slide the jump ring with the tassle and toggle loop onto the end of the chain with the open link. Close jump ring with pliers. Slide the jump ring with the toggle rod onto the opposite end of the chain. Close jump ring with pliers.