

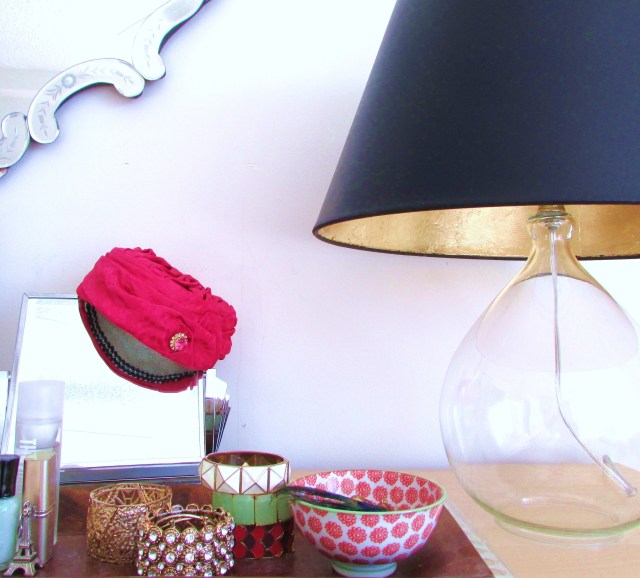
A not-so-obvious perk to working at the Minneapolis Design Center is that showrooms and designers frequently discard perfectly good items due to minor dings and scratches or simply because something has been discontinued. Most recently I discovered this lonely, plain black lampshade that had been tossed and knew I could give it a good home. I’ve had my eye on the gold lined lampshade trend for awhile and decided this discovery was my cue to seize the day, so I picked up some faux metal leafing and spray adhesive at Utrecht and got to work gold-leafing the lining of my new shade this past Saturday.
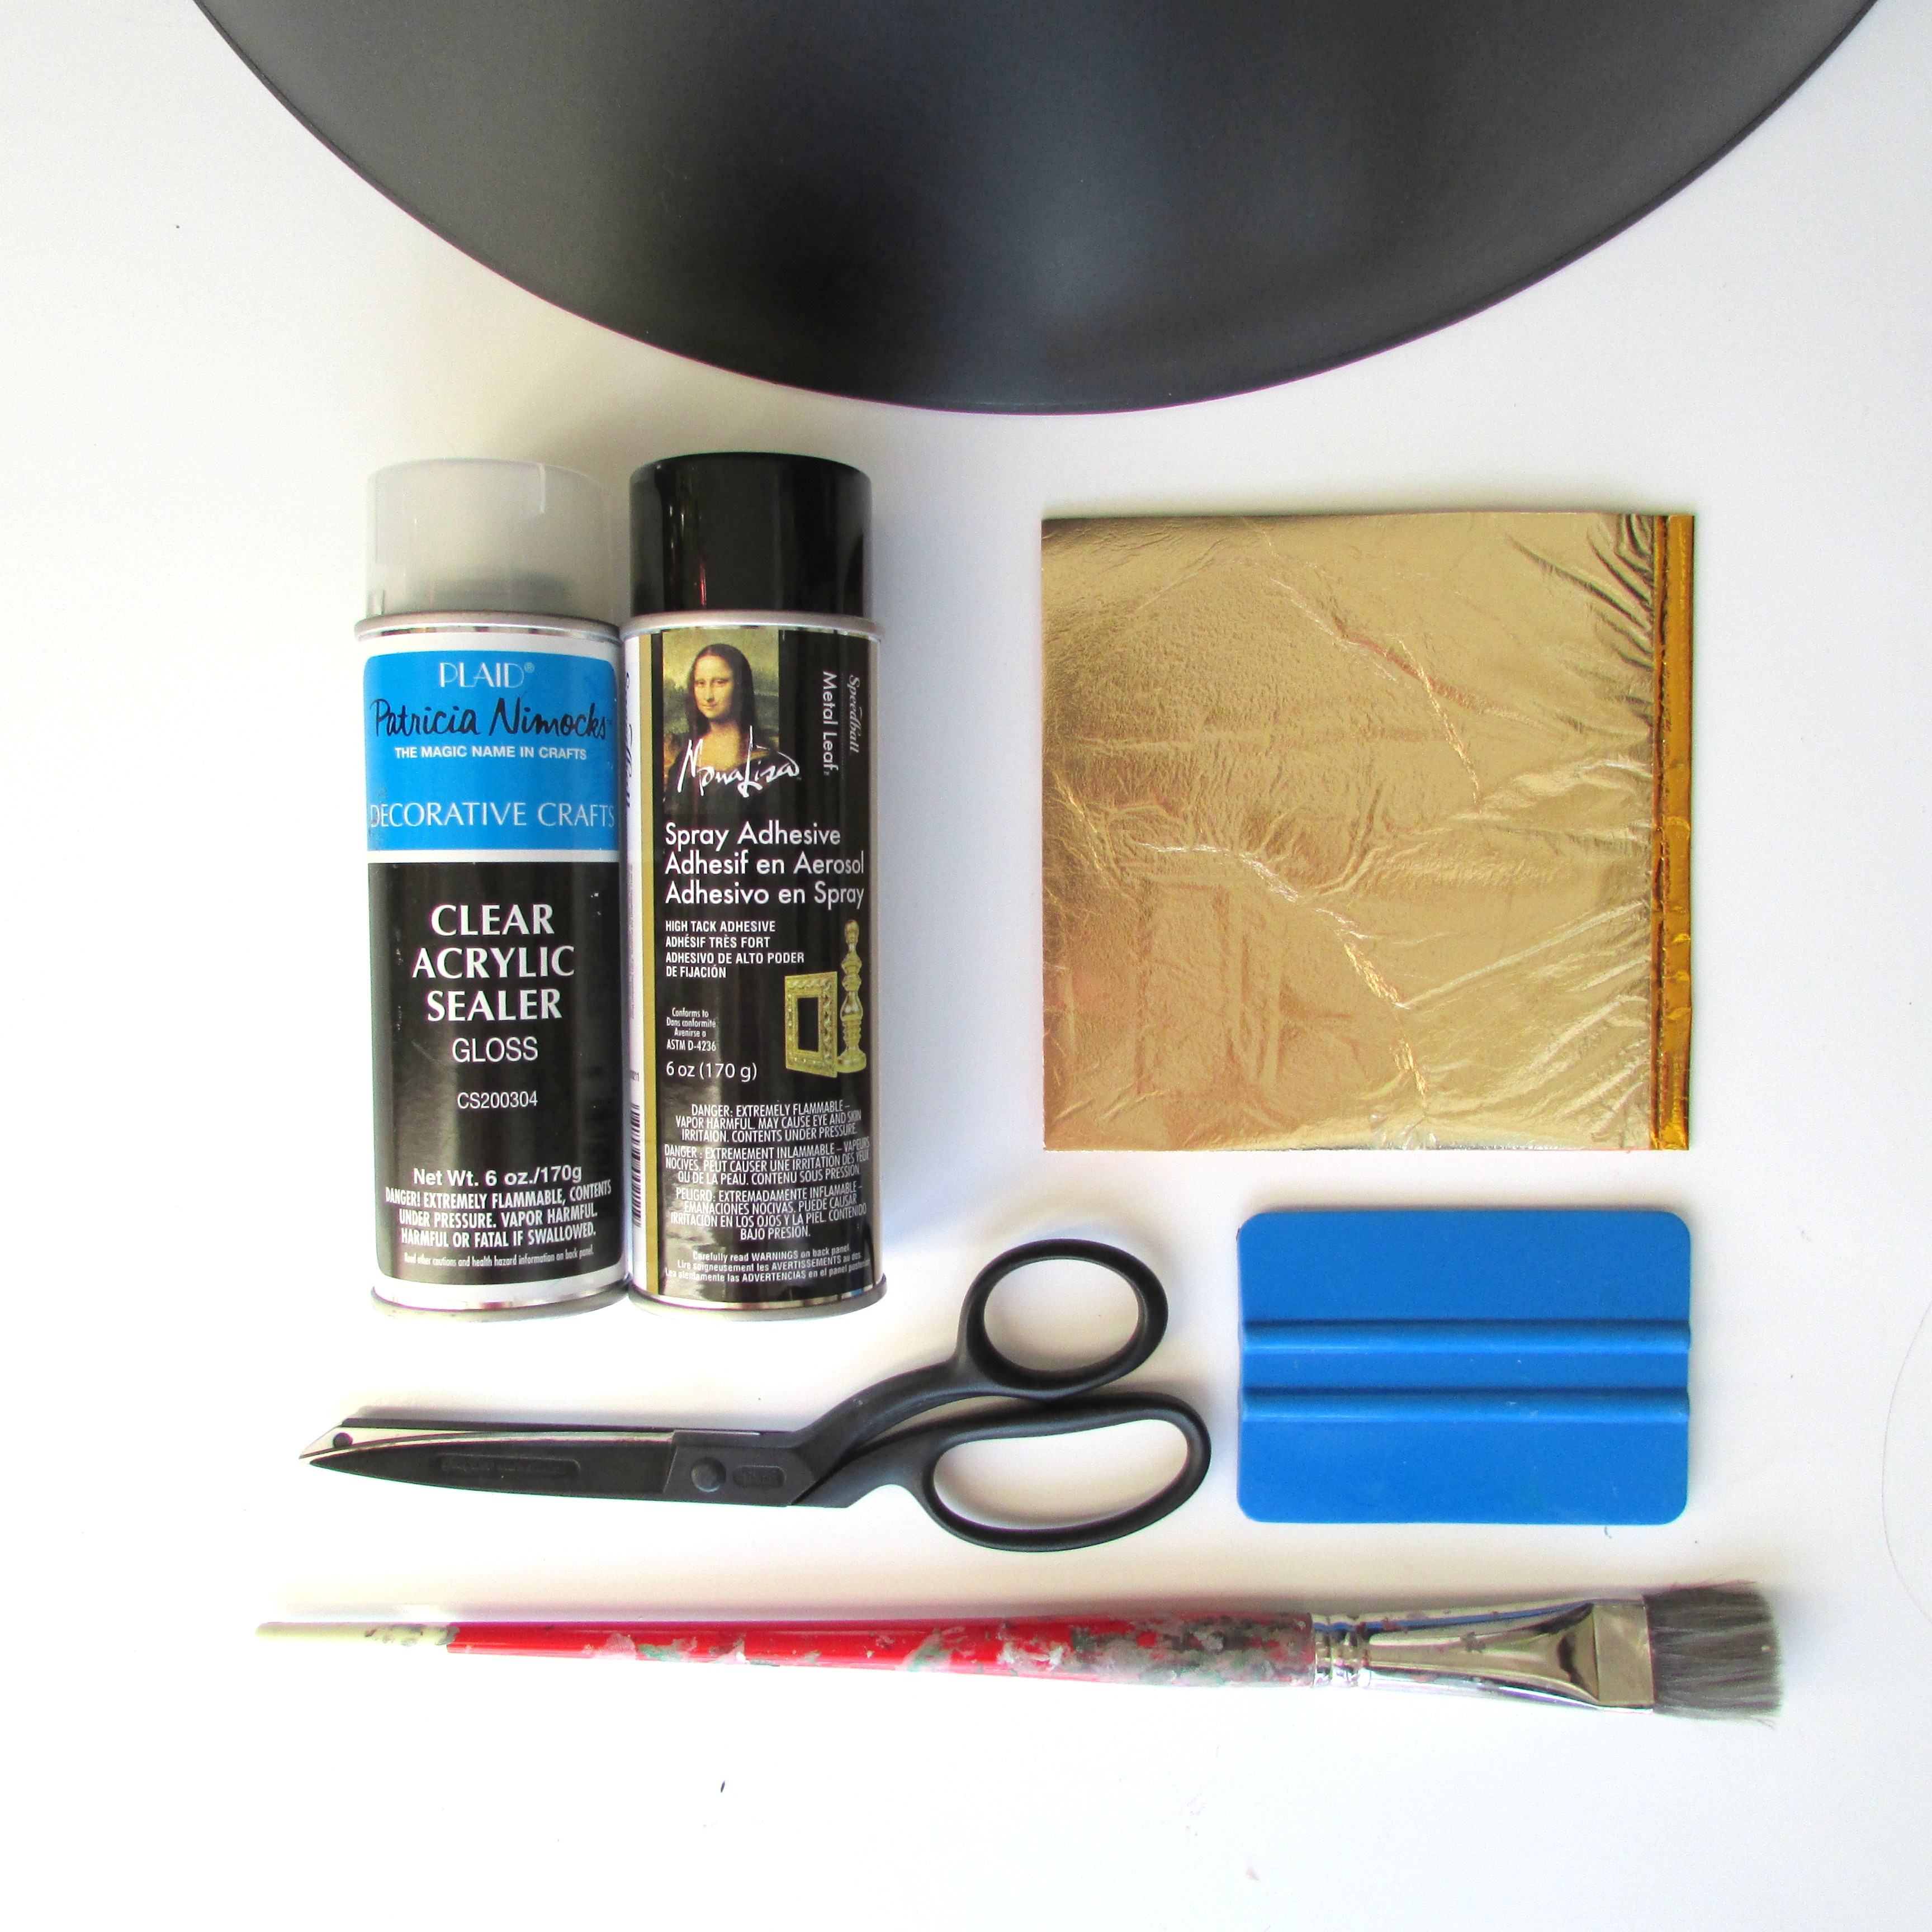
Materials List:
- lampshade of choice with a paper lining
- large plastic garbage bag–the size of the bag will depend on your lampshade size. I used a 13 gallon bag.
- masking tape
- Speedball Mona Lisa Gold Composition Metal Leaf
- Speedball Mona Lisa Metal Leaf Spray Adhesive
- clear spray acrylic sealer. I used Plaid, but I believe Speedball is what is recommended.
- 1″ or larger paint brush or foam brush
- scissors
- soft cloth or burnisher

Step 1. Protect the Exterior of the Shade: Unfold garbage bag and cut a slit down one side. Slide garbage bag over the top of the shade, so that the exterior of the shade is covered. Flip the lampshade upside down, and trim off any long edges of the garbage bag, leaving 2-3″ taller than the lampshade. Roll the edges of the trash bag downward to the top of the lampshade and fasten to the rim of the shade with masking tape. (Masking tape shouldn’t leave a residue.)
Step 2. Apply metal leafing to 1/2 of the shade at a time. Shake spray adhesive can thoroughly, and lightly spray 1/2 of the inside of the shade. Spray 8-10″ away from the surface, in both horizontal and vertical directions. Allow to set for 2 minutes. (Adhesive will remain tacky for 24 hours, so don’t worry about hurrying through the metal leaf application process.) Please also read notes below.

Step 3. Apply metal leaf by placing each square, edge to edge, onto the shade. Press down gently, but thoroughly with a paint brush to make sure the leaf is well adhered to the shade. I started in the middle of the shade and worked my way to the edges. Use scissors to carefully cut metal leaf squares into smaller pieces to cover smaller areas.

Step 4. When the first 1/2 of the shade is completely metal leafed, spray the other side of the shade with adhesive. Keeping in mind the hints from Step 2 and the notes below. Apply metal leaf to the 2nd half of the shade.
Step 5. When the entire shade is metal leafed, flip the shade right side up and using a soft cloth or burnisher gently wipe away any loose flecks of leafing.
Step 6. Seal metal leaf surface by spraying with clear acrylic sealer. Allow to dry.
Step 7. Remove plastic bag, and place onto lamp base.
Notes:
- Make sure to work in a well ventilated area. The spray adhesive and acrylic sealer are potent!
- When applying adhesive use a thin layer of even consistent strokes. Avoid puddling.
- Metal leaf is very fragile and will tear easily. Be gentle, but if it tears, don’t worry! Just piece it back together by applying it to the shade.


hamonious
January 9, 2014 at 2:46 pmI LOVE LOVE LOVE that gold leafing idea! I have a plain old white shaded lamp at home and am trying to figure out how to “spruce” it up! I love the gold with the black. Great job!
Using Silver Leaf to Renew Old Hardware The Flying C
March 18, 2014 at 3:36 pm[…] The Gilded Shade […]