

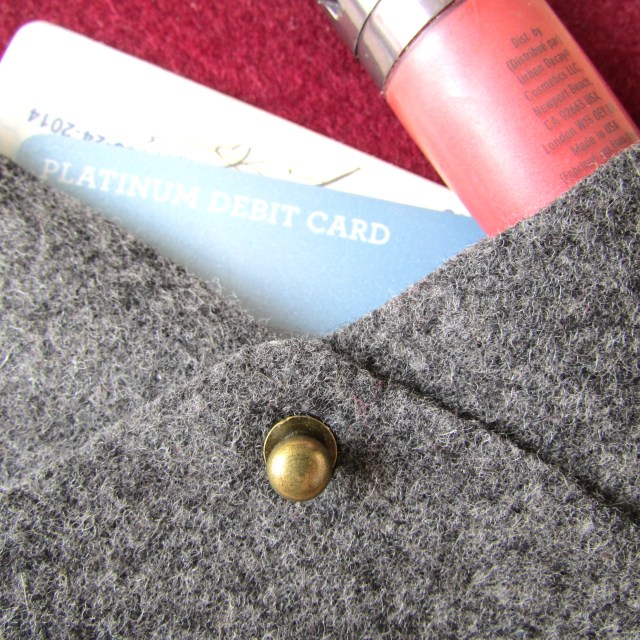
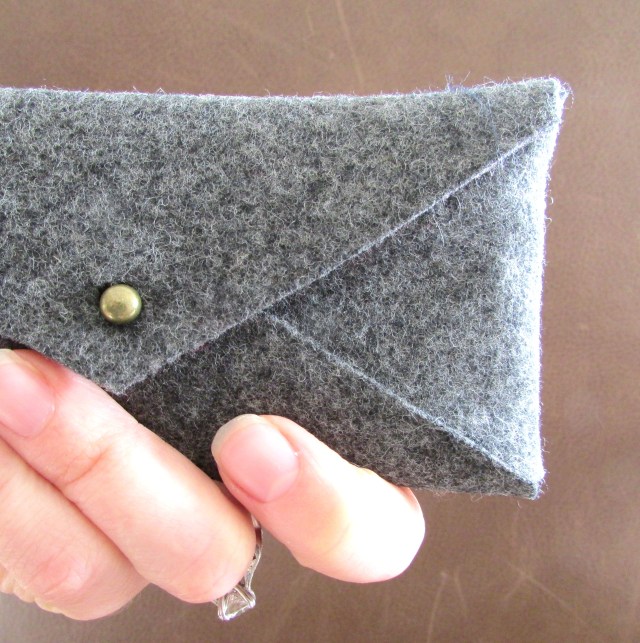
I came across For the Maker’s DIY Leather Pochette a few weeks ago, and was immediately drawn in. I’ve been wanting a little clutch for times, like a low-key Saturday morning brunch, when I’d rather just bring the essentials and not have to look after my big handbag. I didn’t have leather on hand, so I decided to make the case out of felted wool, and I added a contrasting lining for fun! The simplicity of the pattern and the no-sew aspect, make for a quick project. Once you gather materials, you’ll be able to pull this baby together in under 2 hours. (And 2 hours is generous; I watched a movie while I made mine, so if you stayed focused, I bet you could make yours faster!)

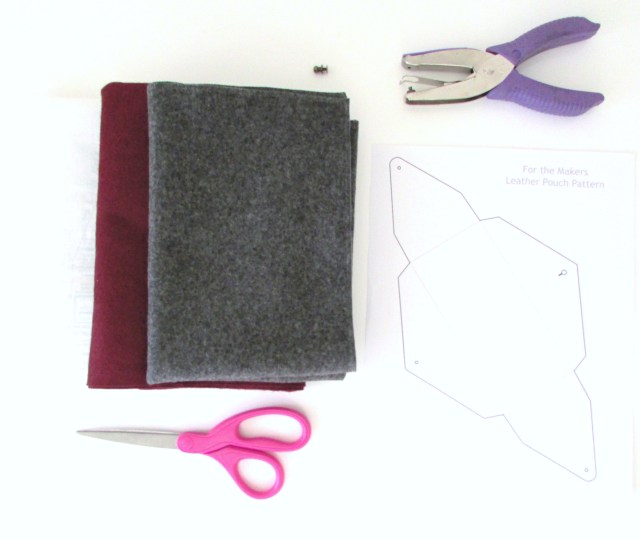
Materials List:
- 8.5″ x 11″ piece of felt fabric of your choice for the main part of the clutch
- 6″ x 6″ piece of contrasting felt fabric of your choice for the lining
- 6″ x 6″ piece of Pellon #805 Wonder Under Fusible Webbing
- For the Maker’s Downloadable Pouchette Template
- One 6mm antique brass button ball head screwback stud available through BagPurseFrames on Etsy
- Pen with contrasting ink to fabric
- 1/8″ Hole Punch
- Scissors
- Sewing Pins
- Iron
- Press cloth
Step 1. Print and cut out the For the Maker’s PDF pattern on 8.5″ x 11″ paper.
Step 2. Pin the pattern onto the 8.5″ x 11″ felt fabric and closely cut the fabric using the paper pattern as your guide.
Step 3. Using a pen with contrasting ink to your fabric color, press through each of the four small circles printed on the pattern to make small marks on the fabric. Remove pins and pattern from fabric.


Step 4. Cut the side and bottom flaps off the of the paper pattern, and pin to the contrasting liner felt fabric. Closely cut around pattern. Using pen with contrasting ink, mark a small circle at the top of the flap. Remove pins and pattern.
Step 5. Pin the same paper pattern to fusible webbing, and cut the same shape. Remove pins and pattern.

Step 6. Place rough side of fusible webbing face down on large felt piece, matching up shapes and edges, and press fusible webbing with hot, dry iron for 5-8 seconds.
Step 7. Let cool and gently peel off paper backing.

Step 8. Place the liner felt piece on top of fusible webbing and cover with damp press cloth. Turn iron to wool setting and press firmly for roughly 15 seconds. Repeat until all areas are fused. Remove press cloth and iron the surface to eliminate excess moisture.
Step 9. Hole punch all four pen marks.

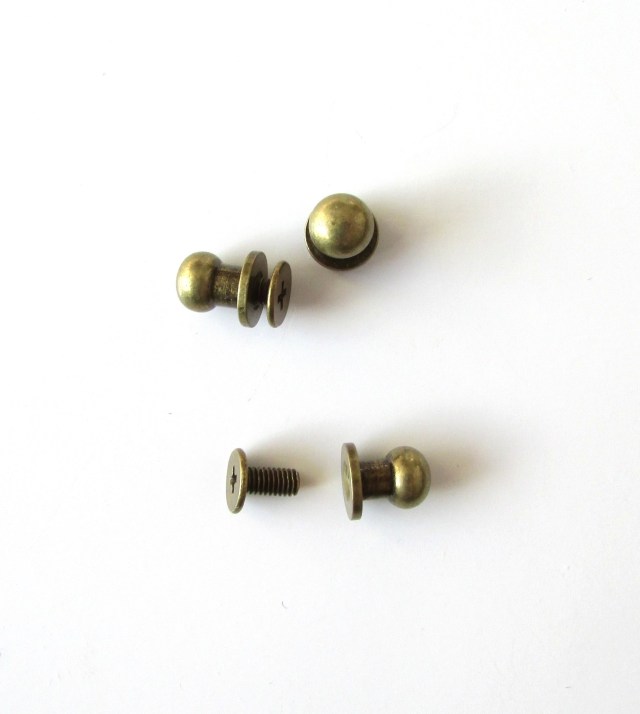
Step 10. Unscrew screw head, and layer side flaps onto the screw back, then fold the bottom flap upward onto screw back. Replace screw ball piece onto screw and secure tightly.


DIY Travel Wallet | francois et moi
April 23, 2014 at 8:23 am[…] front pocket (covered by my top and layered by my crossbody camera bag). It’s similar to my Mini Felted Clutch, only smaller and less complex. This baby came together easily in about an hour (The most […]
bestgrillsreviews2013.com
April 26, 2014 at 9:01 pmHi there! I know this is kind of off topic but I was wondering if you
knew where I could locate a captcha plugin for my comment form?
I’m using the same blog platform as yours and I’m having difficulty finding one?
Thanks a lot!