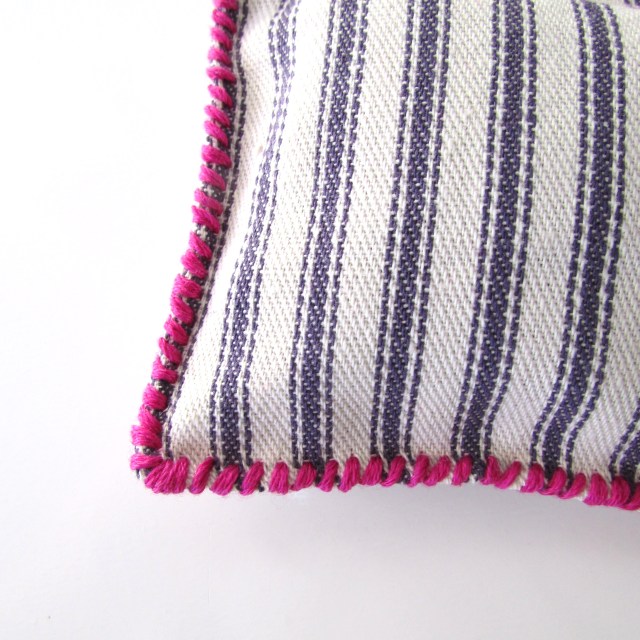
For my wedding showers a few years ago, my mom had the genius idea of making lavender eye pillows as favors for guests to take home with them. There were a few leftover after the shower, so I took an extra one home and tucked it in my “unmentionables” drawer as a sachet and loved the subtle lavender scent it brought to our bedroom, so I decided to take a cue from my mom and sew up some sachets (which are about 1/2 the size of eye pillows), as stocking stuffers this year. Theses little bundles come together pretty quickly (I made three in an evening), and will make a nice, handmade addition to stocking trimmings this Christmas morning.
Materials List:
- 1/8 of a Yard of Cotton Ticking
- White or Ivory Thread
- Hand Sewing Needle
- Sewing Pins
- 8.7 yards of Contrasting Embroidery 6-Strand Floss. I used DMC in Medium Plum.
- DMC Chenille Needle, Size 20
- .5 oz (14 g) Dried Lavender (Available at Whole Foods)
- Scissors
- Ruler
- Pencil
- 1 Sheet of Paper 6″ x 6″ or Larger for Make-shift Funnel
- Scotch Tape
Special Equipment:
- Sewing Machine (Optional, but recommended)
- Iron (Optional, but recommended)

Creating the Fabric Pouches
Step 1. Cut out six identical 4″ squares. There are a variety of ways to do this, but here’s the method I used: Using your pencil and ruler, measure, mark, and cut your piece of fabric down to a 4″ wide x 24″ long rectangle. Make sure the stripes are running across the 4″ width of the fabric, not the length of the fabric.
Step 2. Lay your ruler parallel to one of the long sides of the rectangle, and mark every 4″.
Step 3. Use the ticking stripes as guidelines and cut the fabric at each 4″ pencil mark so that you end up with six 4″ squares.
Step 4. Pair together the squares so they’re in 3 sets of two.
Step 5. Position the faces or “right” sides of two squares so that they’re facing one another. The back sides of the fabric should be facing outward. You’ll know the right side of the fabric because it has darker stripes than the back side of the fabric.
Step 6. About every inch, pin each set of two squares together using sewing pins.
Step 7. Make sure your sewing machine is threaded with white or ivory thread, and begin sewing at one corner of the square using 1/4″ seam allowance. Sew roughly 1 inch. Stop, pull the pouch off the machine, and cut your thread. Position the pouch back on your machine and begin sewing on the same side of the pouch roughly 2″ lower than where you left off on the first inch of stitching. Sew the remaining inch, as well as the other three sides of the pouch. (Leaving a 2″ gap in the earlier part of this step, will create an opening in the pouch, which you’ll use to fill the sachet with lavender later.) This step can also be achieved with hand sewing using a thread and needle, but it will take quite a bit longer.
Step 8. Cut each of the corners off at a 45″ angle. Be careful not to cut the stitching.
Step 9. Turn the pouch right-side-out, by pushing the corners through the opening, and use the blunt point of a closed pair of scissors to create crisp, square corners. Once turned right-side-out, the pouch will be 3.5″ x 3.5.”
Step 10. Iron the pouch flat, especially at the seams. Pressed seams will be useful when adding contrast stitching later.
Filling the Squares with Lavender:
Step 11. Create a paper funnel by rolling up a piece of paper so that one end has a slightly larger opening than the other, and secure with a piece of tape, similar to the funnel pictured below.
Step 12. Measure out one heaping quarter cup of lavender.
Step 13. Place the small opening of the funnel into the pouch opening and add lavender to the funnel.
Step 14. Using a needle and thread, hand sew the opening shut using a whipstitch. Don’t worry about making your stitches exactly perfect, as they will be covered by the decorative contrast stitch.
Adding Contrast Stitching:
Step 15. Create Pencil Guidelines: Place your ruler roughly 1/16″-1/8″ from the edge of one side of the pouch and lightly mark a guideline to use while adding the contrast stitch. Repeat with the remaining 3 sides.
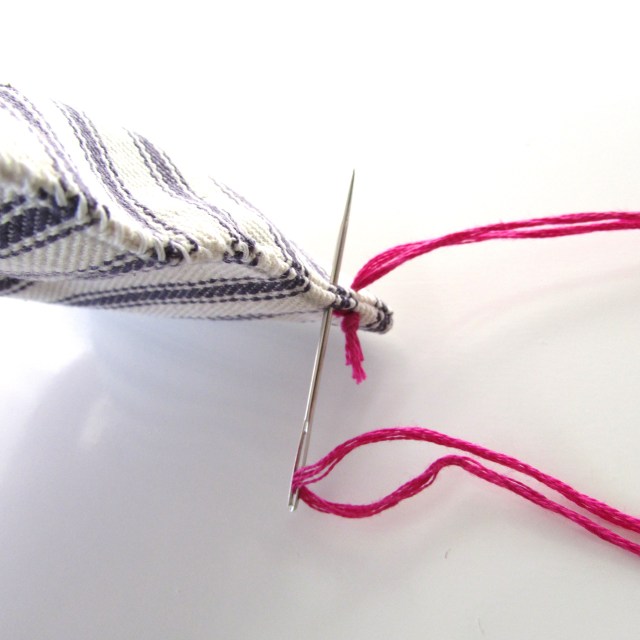
Step 16. Thread the larger embroidery needle with a contrasting embroidery thread roughly 105″ long (once threaded and knotted the thread will be about 52.5″ long). Using the same whipstitch technique as before, stitch along all 4 sides of the pouch using your pencil marks to help keep your stitches uniform.
Step 17. When finished, tie a knot as close to the base of the thread as possible, trim excess thread, and tuck the tail into the proceeding stitch, if possible.
Step 18. Repeat Steps 7-17 until a set of 3 sachets are complete.
Bundle the sachets with leftover embroidery thread, and so they’re ready to be tucked into Christmas stockings!


Jennifer
December 3, 2013 at 2:39 pmKate made these last year for Christmas gifts for her teachers, piano teacher, etc. It’s a great mother/daughter craft for beginning sewers as well.
francoisetmoi
January 23, 2014 at 2:51 amJen, that’s awesome! These would definitely make great teacher gifts!
Handmade Gift Round-up | francois et moi
December 20, 2013 at 1:41 pm[…] Indigo Tea Towels, b. Lavender Sachets, c. Salted Bourbon Caramels, d. Vanilla Extract, e. Paperwhite Bulb Kit, f. Tartan […]
20 Brilliant Natural Ways to Summon the Scent of Fall at Home
November 3, 2016 at 3:39 pm[…] via Francois et Moi […]